Configure Modem For Standard Broadband
When to use this guide:
- Using our modem
- If you can't get online
- If you've reset your modem to its factory settings using the reset button
- If you've been instructed by a support representative
- Using your own modem
- Getting online with your own modem
This guide will help you get connected to the internet, this guide assumes that your 'Go-Live' date has passed and your service is active. If after following this guide you still can't get online, please contact us. This guide will use steps unique to the modem we supply, so not all the steps will apply to your own modem.
This guide is for Standard Broadband, if you've got 'Fibre and Fibre Plus Broadband', use this guide instead
What you'll need
- The modem and all associated parts:
- DSL cable
- Power supply
- Ethernet cable
- A desktop PC or laptop that has an Ethernet port, if you're using a MacBook or a computer that only has WiFi, see the bottom of this article.
1 - Reset your Modem
Press and hold the 'WPS/RESET' button on the back of the modem. Keep holding the button until either the power light flashes, or all lights flash then turn off, then release the button. The modem will take a minute or so to reboot.
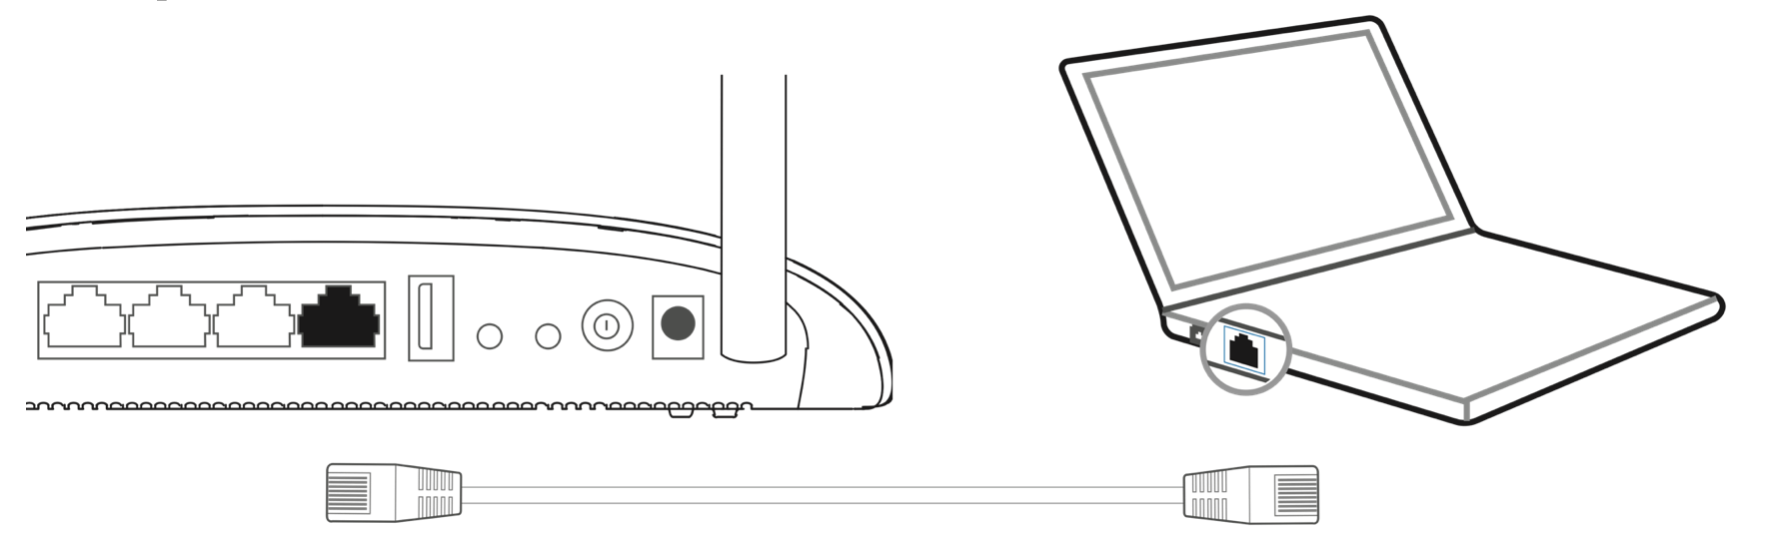
Next, we need to connect the modem to a computer. Using the yellow or grey included Ethernet cable, plug one end into the modem (LAN1 Port) and the other into your computer's Ethernet port. An additional light on the modem will turn green when the connection is established.
2 - Access the Web Control Panel
On your computer, using a web browser navigate to:
If you're asked to login, enter:
- Username: admin
- Password: admin
You should be forwarded automatically to the 'Quick Start Page'.
Video Walkthrough
3 - Configuring Modem
If you're not automatically directed to the 'Quick Setup' page, on the lefthand side menu, click 'Quick Setup'. You'll be asked to specify your region and timezone. For Karma broadband to work correctly, make sure you pick 'United Kingdom' and 'UTC'. Click 'Next', select 'No, I want to configure the internet connection myself' then click 'Next'.
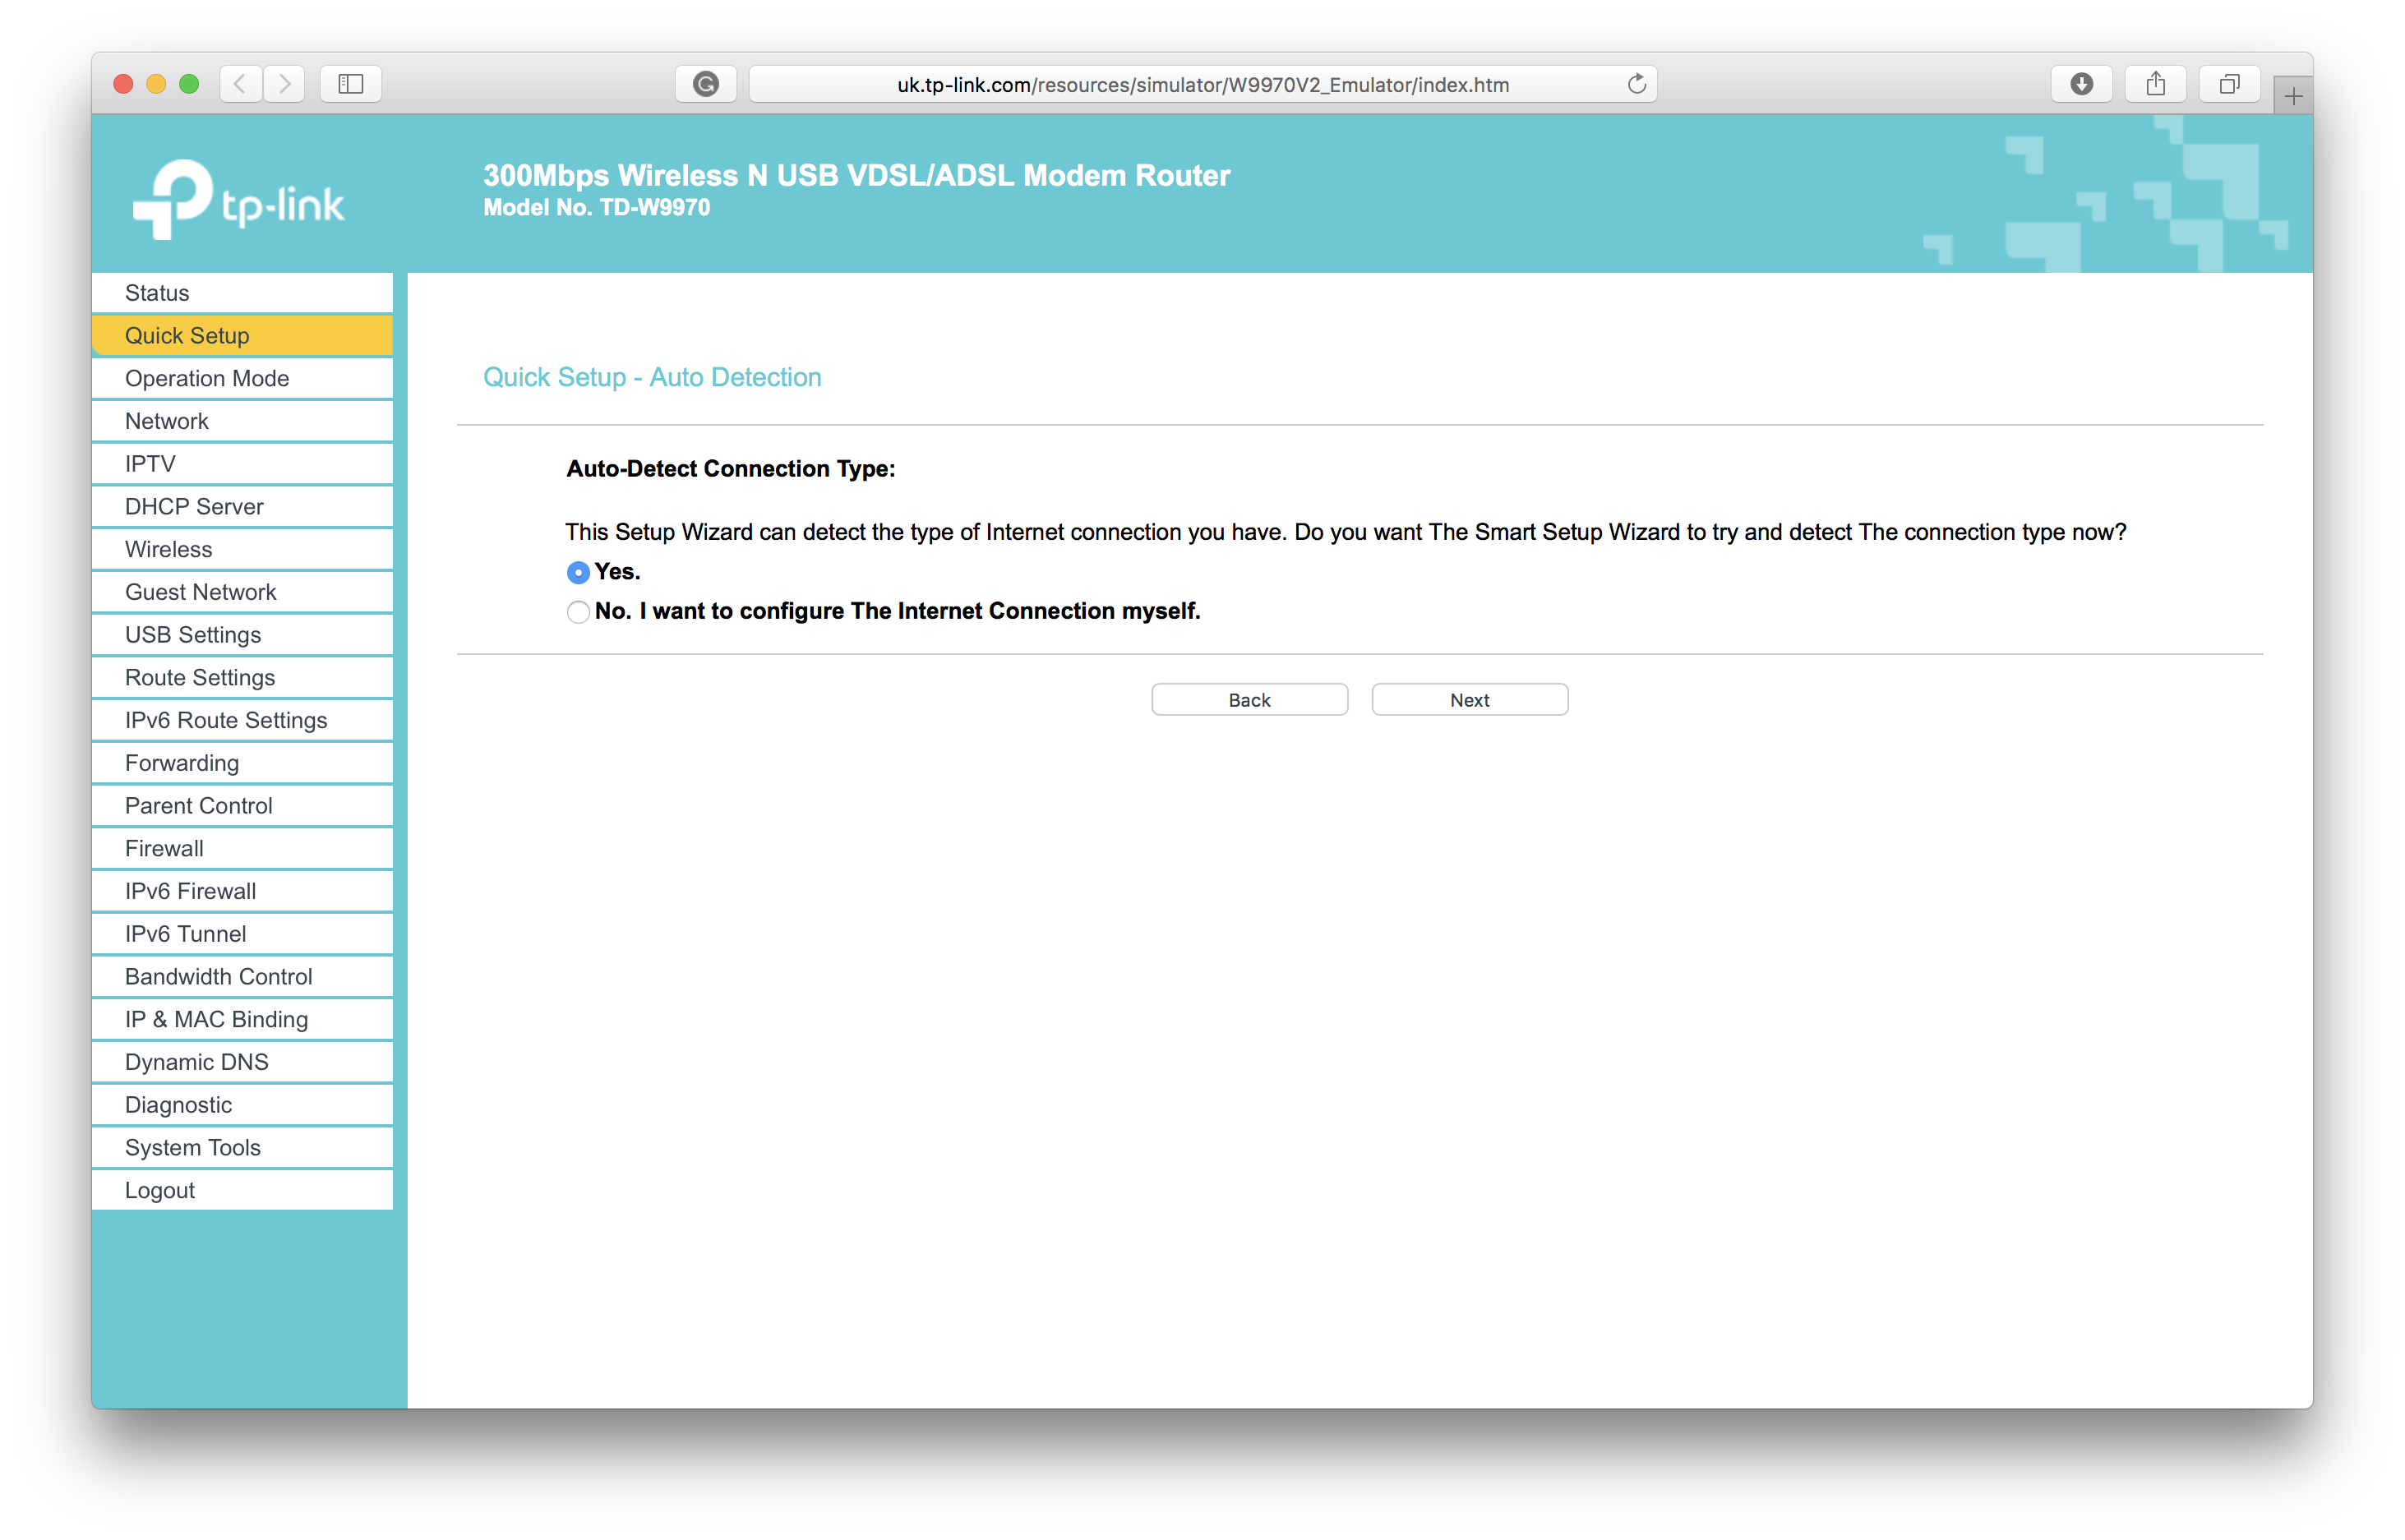 Click to view this image larger
Select 'Other' from the ISP list, then from 'L2 Interface Type' select 'ADSL'. Then set:
VPI: 0
VCI: 38
Connection Type: PPPoA (PPP Over ATM)
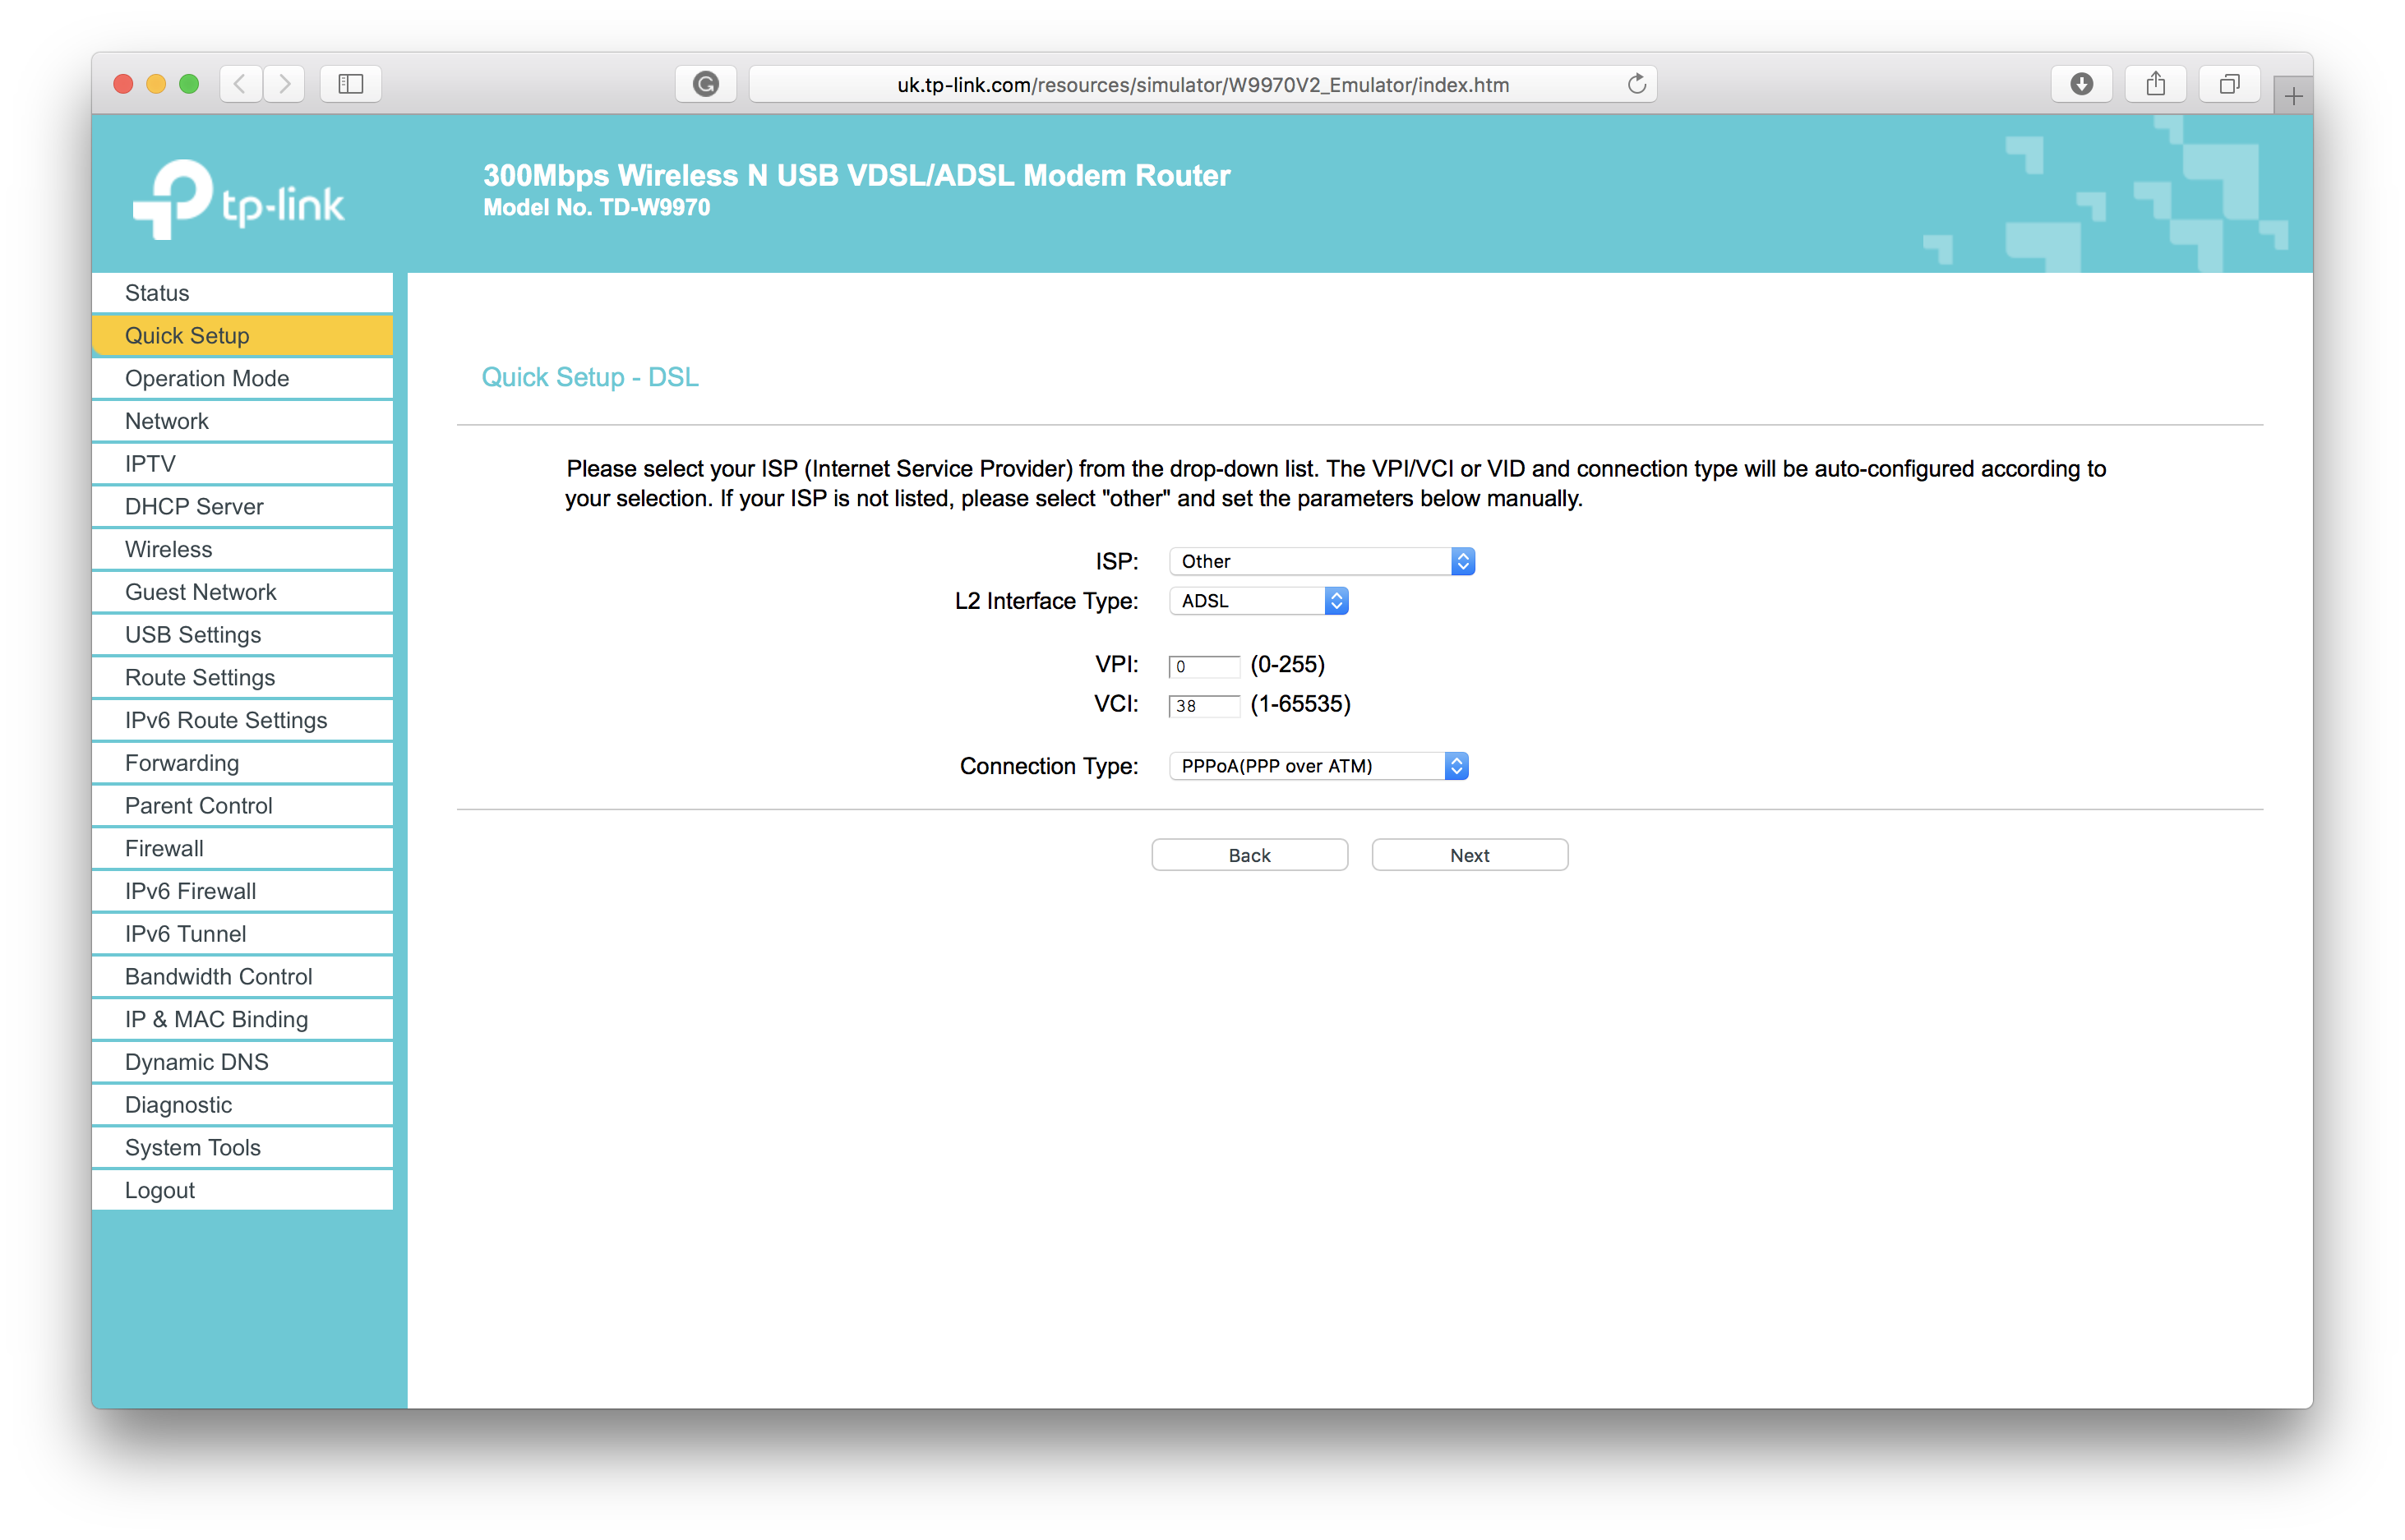 Click to view this image larger
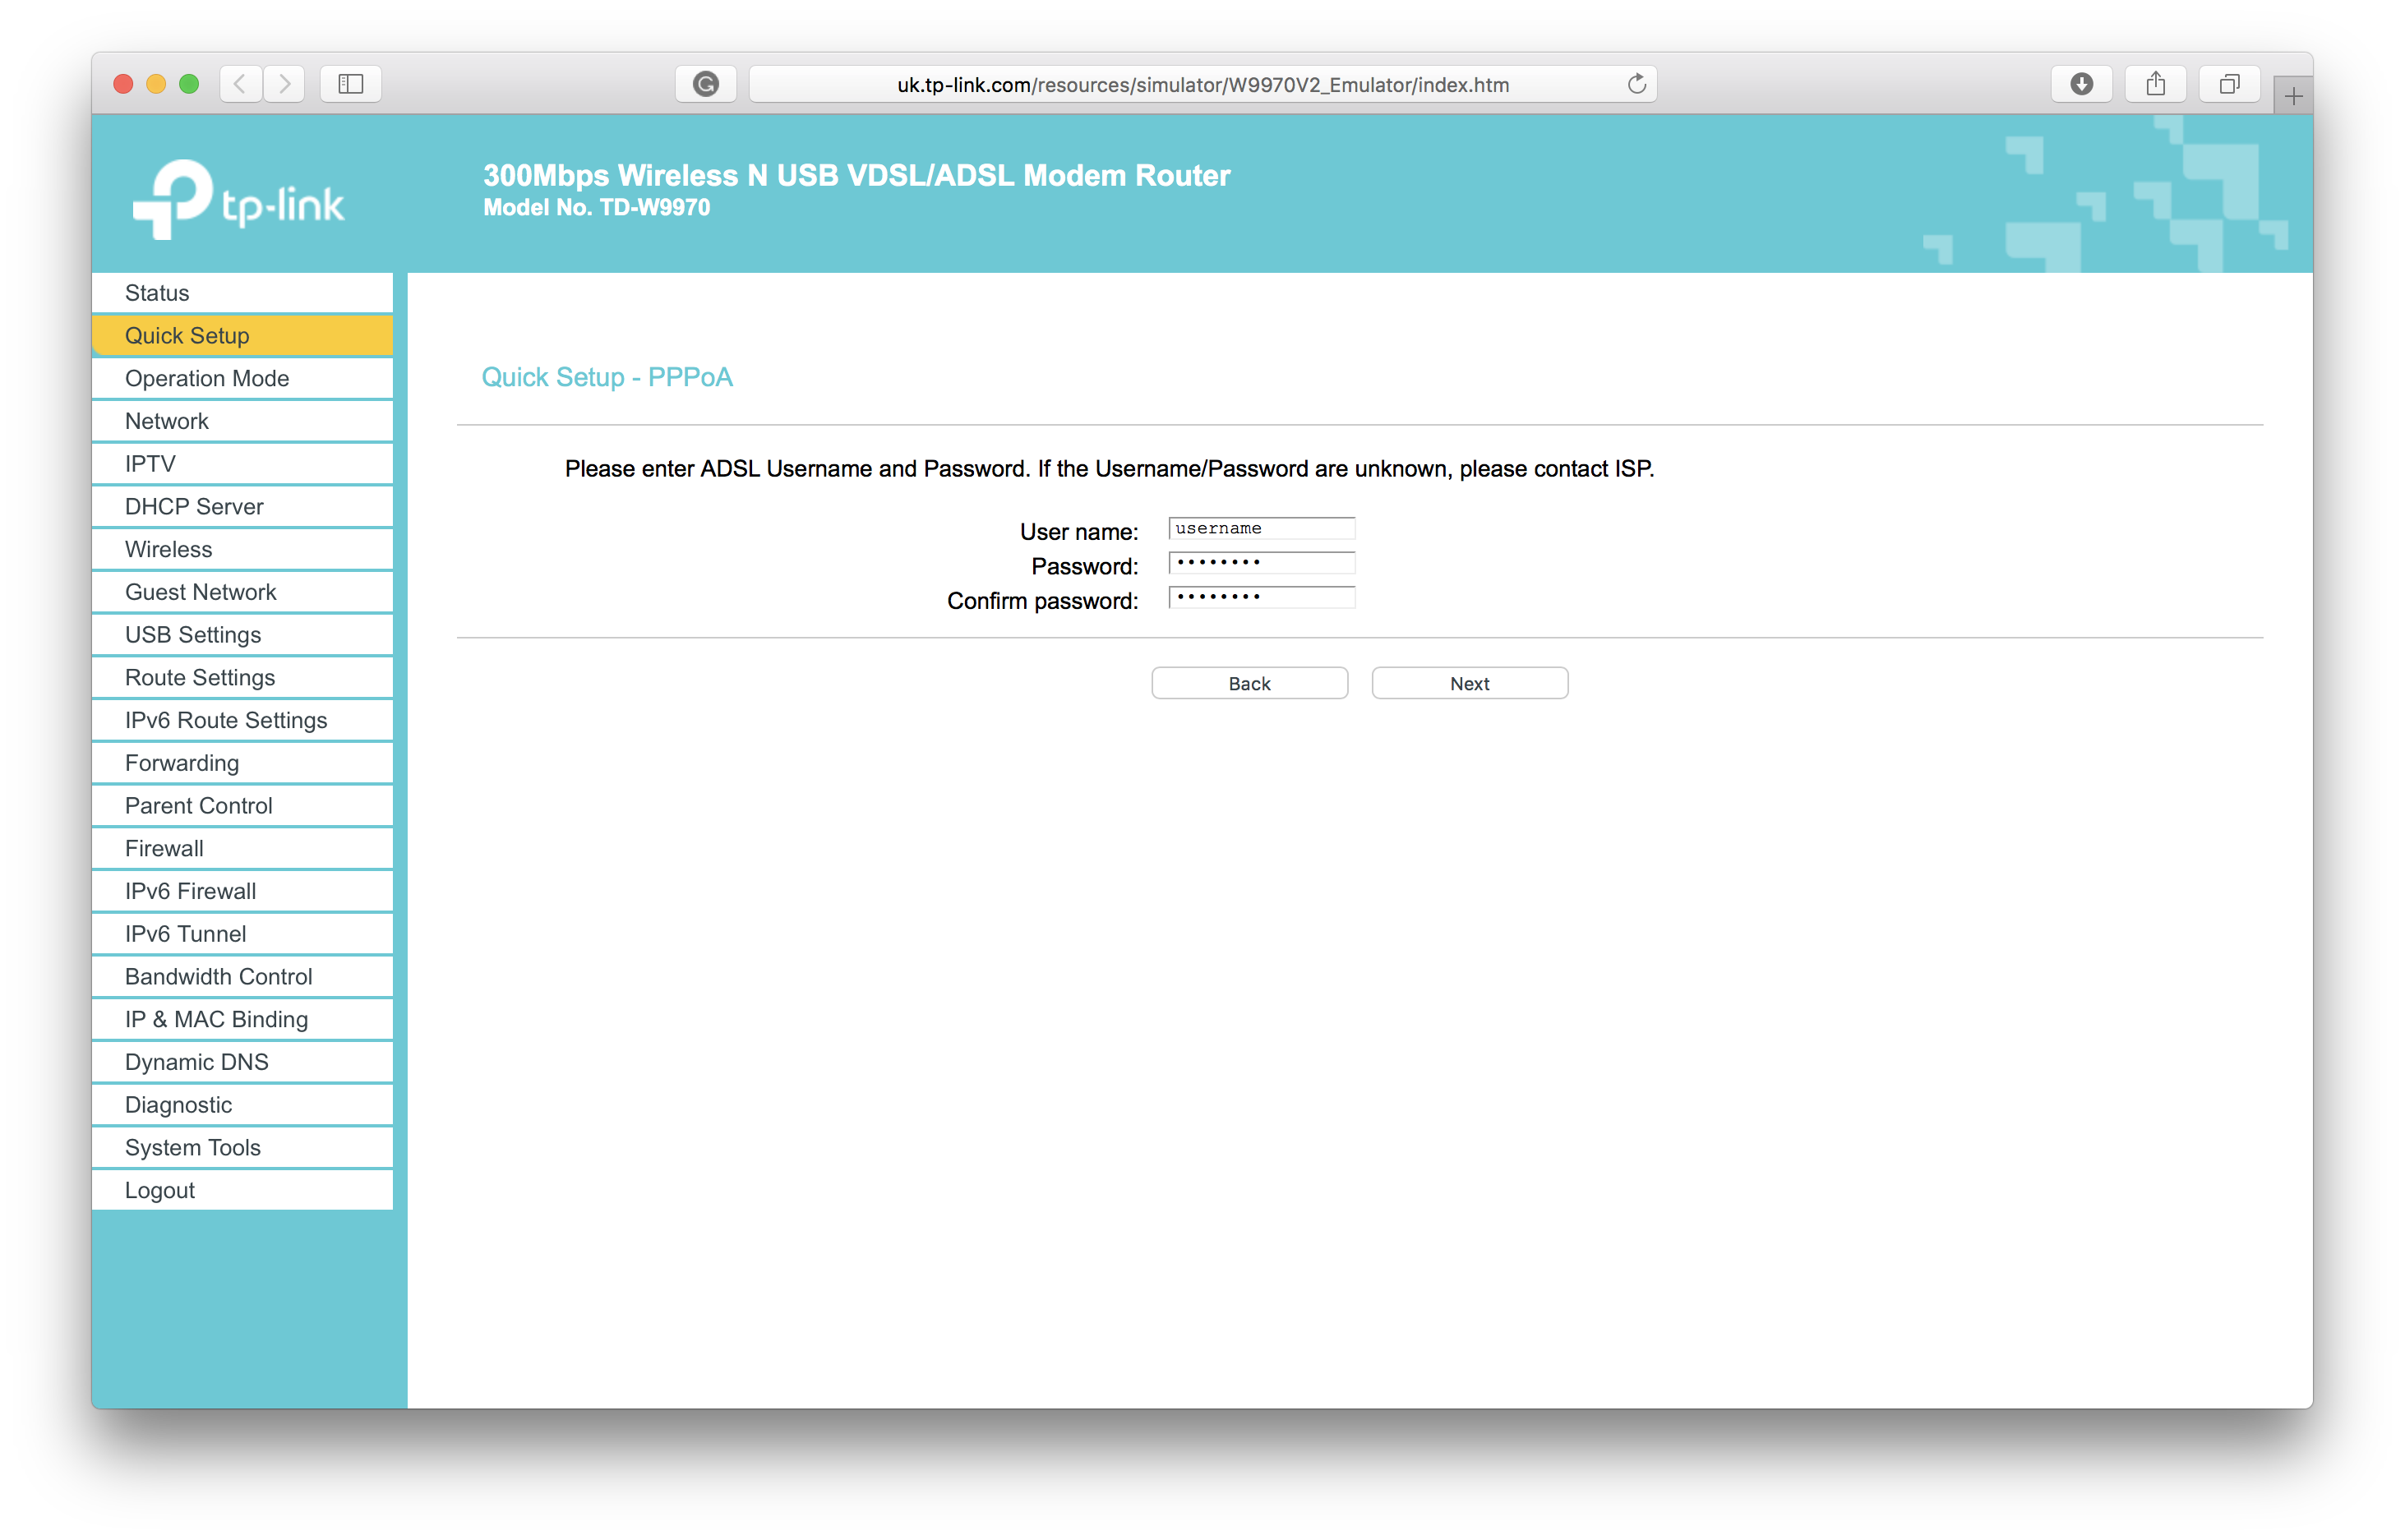
You'll need to contact support in order to obtain these details
Enter your DSL username and password, make sure you double check these because if they're wrong you'll not be able to go online
 Click to view this image larger
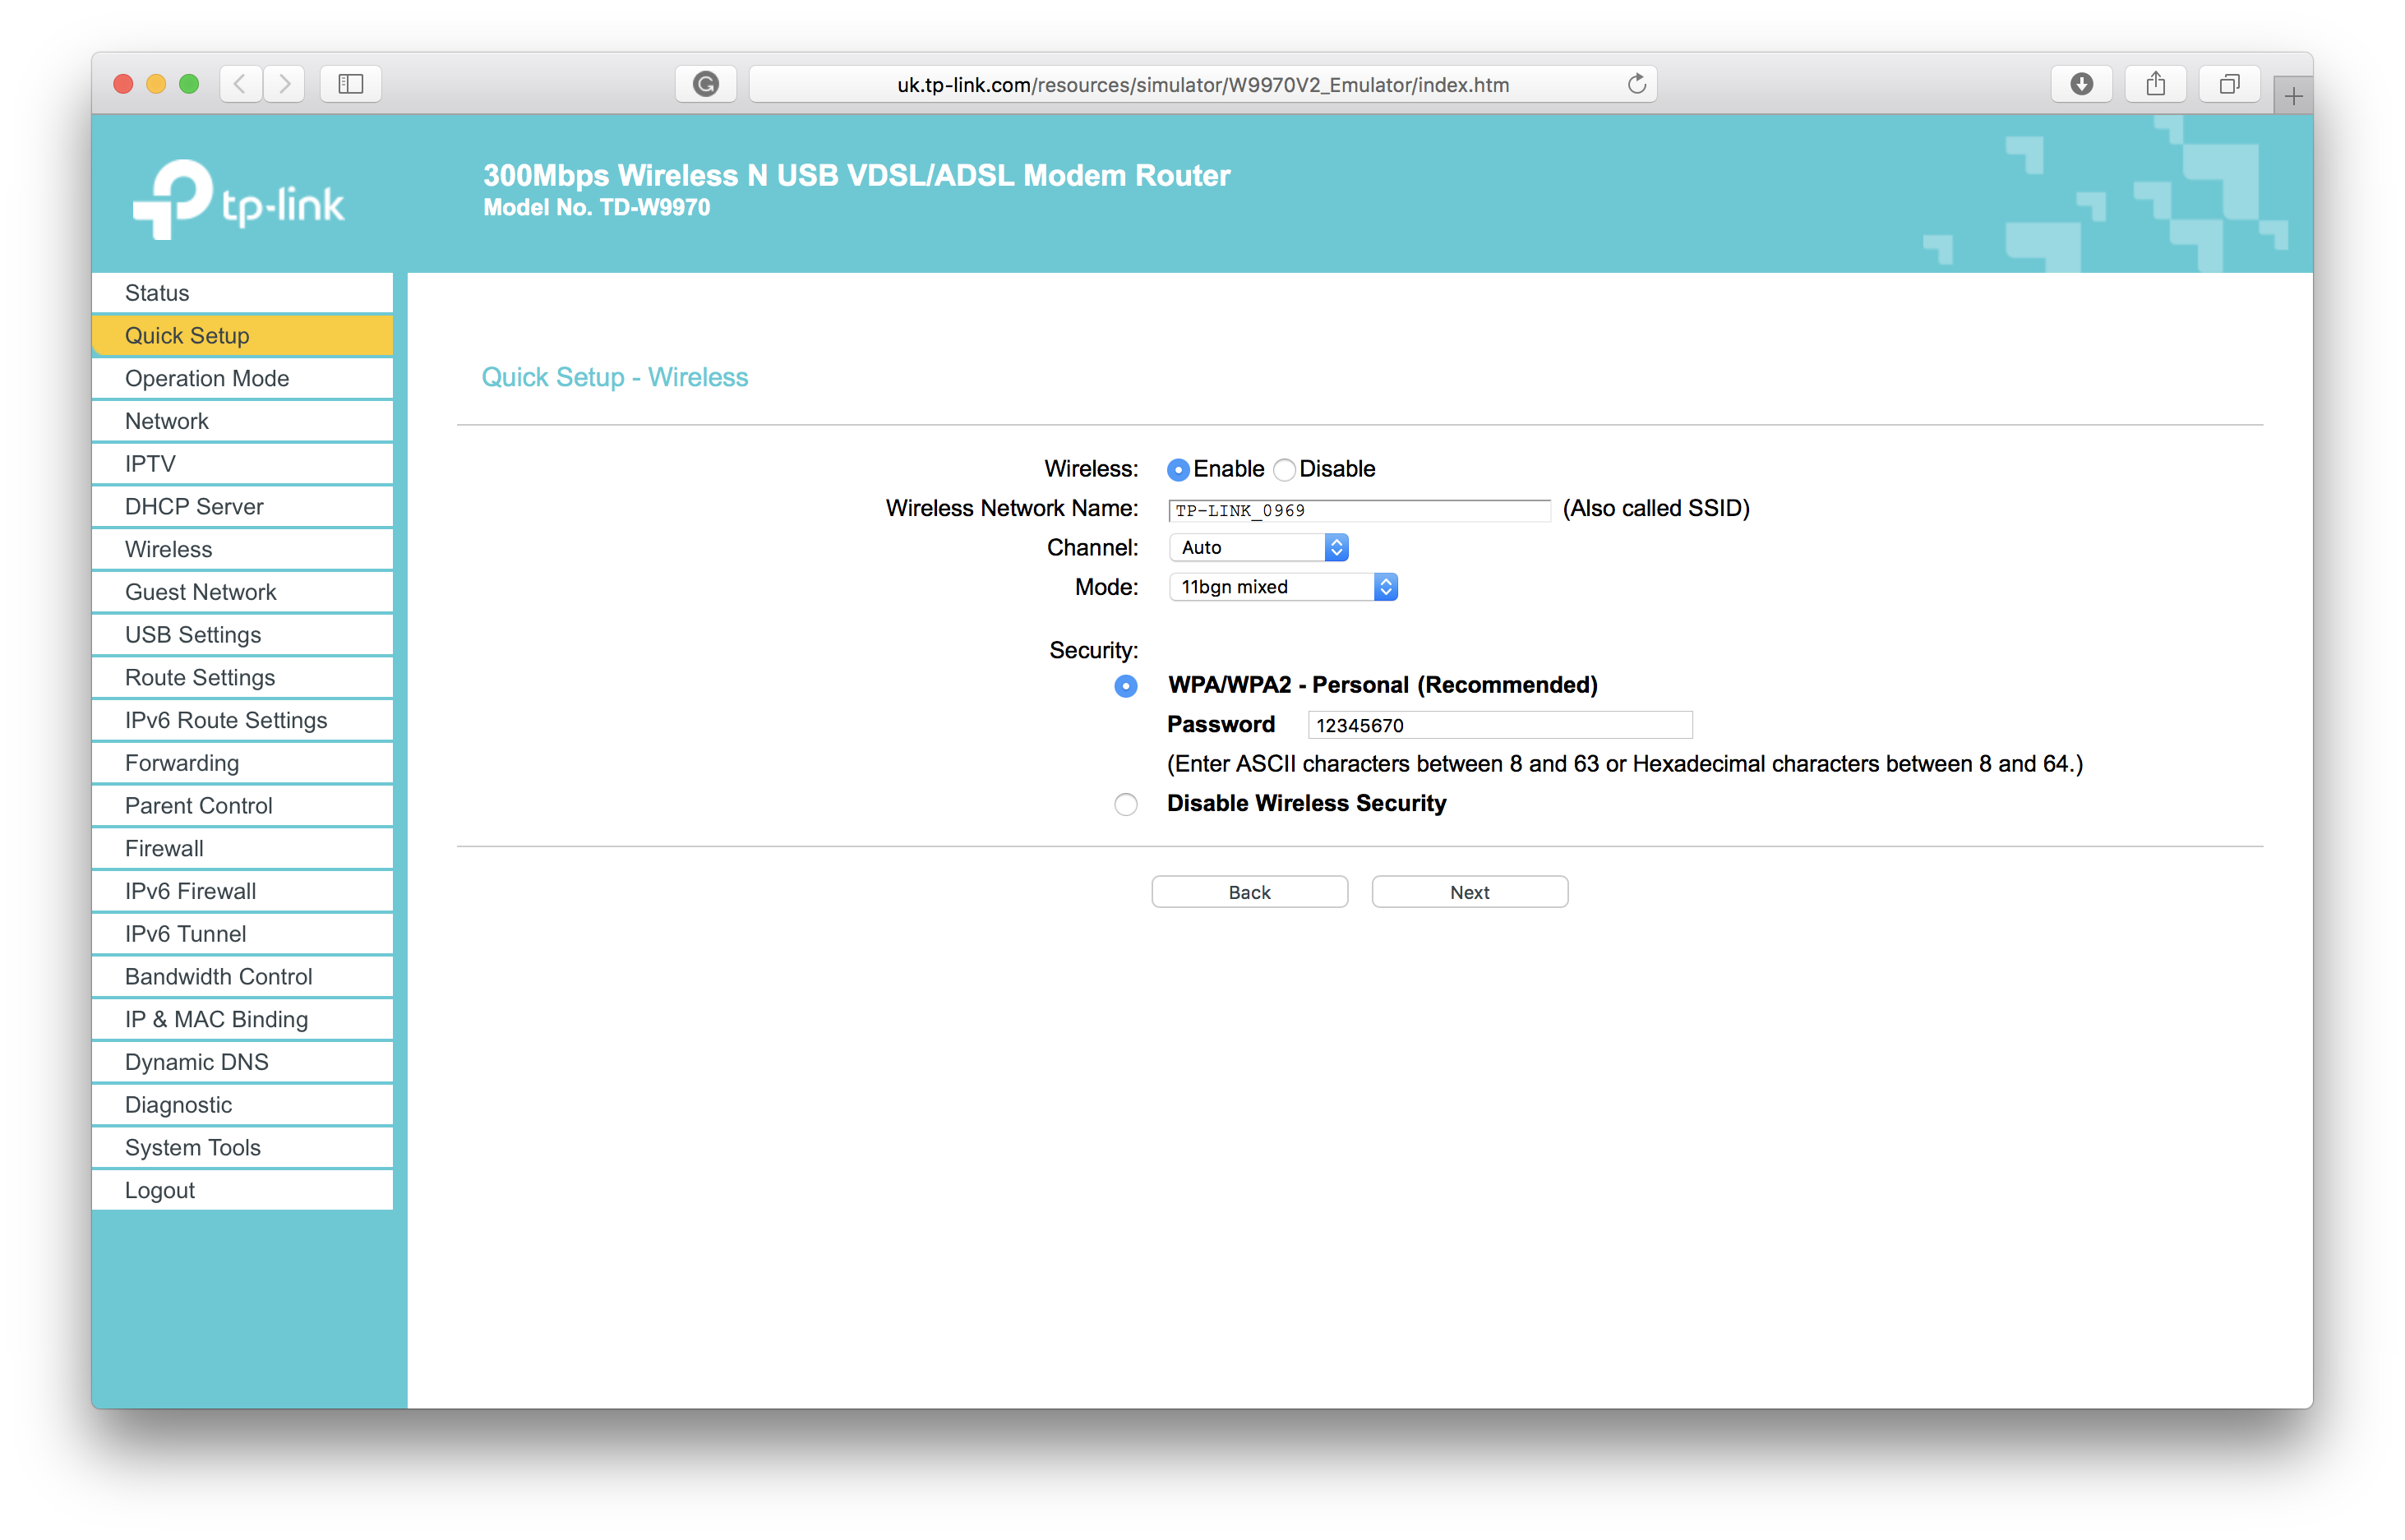
For the WiFi settings, it's easier to re-use the details on the modem's sticker. However you're free to set these to whatever you'd like. These settings are what you used to connect your wireless device to the modem (such as an iPhone or laptop). Make sure that:
Channel is set to 'Auto'
Mode is set to '11bgn mixed'
Security it set to 'WPA/WPA2 - Personal'
 Click to view this image larger
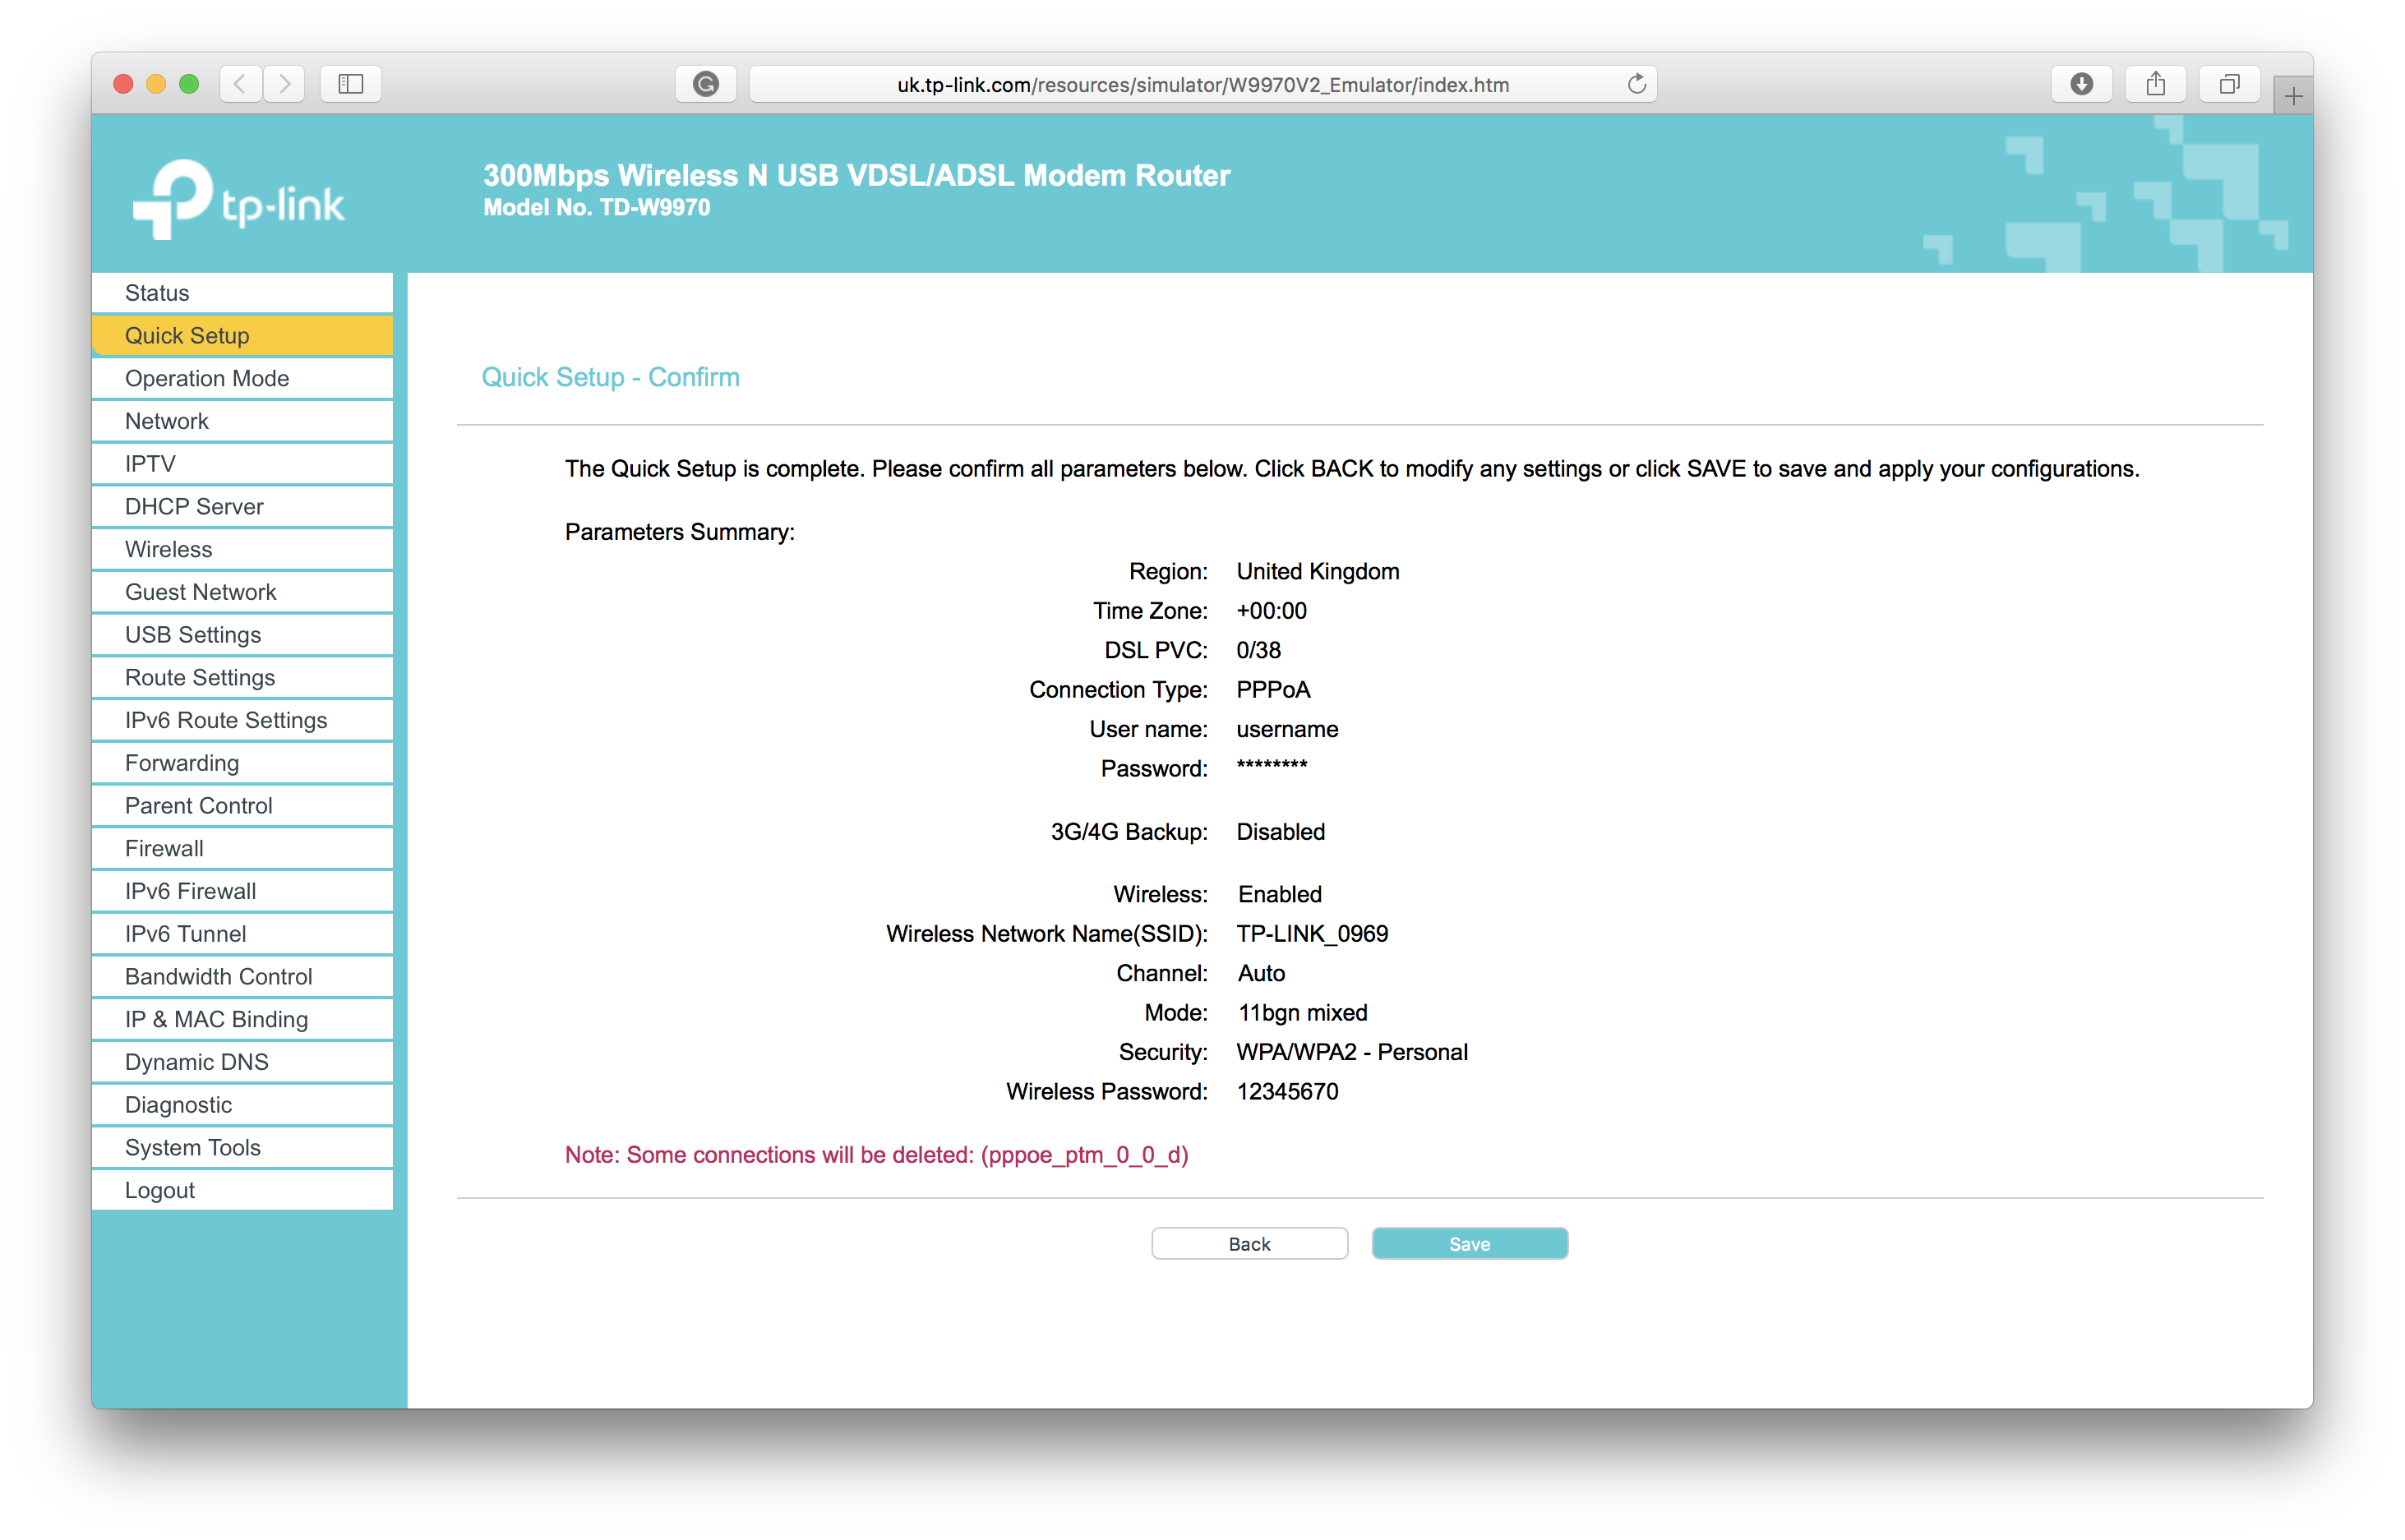
On the summary page, make sure the information you entered is correct. To confirm the changes made, click 'Save'. It'll take about 2 minutes for the modem to reboot.
 Click to view this image larger
Finishing touches
After resetting your modem, you've removed a few security features we activated in order to secure your connection, to learn how to turn these back on read this guide.